Obsidian
A desktop knowledge-management app. Notes are ordinary local files inside a vault folder. Obsidian itself is not a server.
Modow 3.1.2 / Sync Onboarding
Understand four roles, then fill in four fields. This guide explains how Obsidian, Self-hosted LiveSync, CouchDB, and Modow fit together before walking you through installation, configuration, and your first sync.
On your computer, Obsidian keeps notes as ordinary local files inside a vault. The Self-hosted LiveSync plugin replicates changes to your CouchDB. On HarmonyOS, Modow connects to that same CouchDB. Each side keeps a local copy; CouchDB relays changes between them. No network? Keep writing. Back online? Sync resumes.
A desktop knowledge-management app. Notes are ordinary local files inside a vault folder. Obsidian itself is not a server.
A plugin inside Obsidian that sends and receives vault changes. It is the protocol adapter, not the server and not the database.
The remote database on your NAS, home server, or cloud host. Desktop and mobile use it to exchange changes. It is not either device's local folder.
An independent local-first HarmonyOS app. It is not “Obsidian for HarmonyOS.” It speaks the same LiveSync protocol and connects to the same CouchDB.
The CouchDB database name identifies the remote sync database. It may match the vault folder name or not; both clients must use the same database name.
Modow is an independent HarmonyOS app with no affiliation to Obsidian. Compatibility comes from speaking the same sync protocol.
The plugin moves changes in and out of Obsidian. Your CouchDB is the server and remote sync database.
Make sure your devices and data are ready. Never use your only copy of an important vault for a first-sync experiment.
Requires HarmonyOS NEXT and supports API 14+, phones, tablets, and foldables. Install only through an official Modow release channel.
Copy your desktop vault or remote directory. Verify upload, download, rename, and delete using a small test library before connecting real data.
Both routes bring files to your phone; they connect to different backends. Use one route per vault and never let multiple sync tools write the same vault at once.
You already use Obsidian Self-hosted LiveSync, or you are willing to deploy CouchDB. Desktop and mobile use the same four database fields.
You have Jianguoyun, Synology, UGREEN, QNAP, Nextcloud, AList, or another standard WebDAV service. Both ends point to one remote directory.
The installer creates an isolated CouchDB, a lower-privilege daily sync account, and a LiveSync database. Run it on an always-on NAS, home server, or cloud host.
Open Terminal, download the installer and checksum list, verify the file, then run it:
Check the environment without installing: bash install.sh --doctor
Start Docker Desktop, then run the following in PowerShell:
Confirm the SHA256 matches checksums.txt. Environment check only: .\install.ps1 -Doctor
The administrator is used only for deployment and database creation. Daily sync uses a separate account with fewer permissions.
Use one database per vault. Database names should contain lowercase letters, digits, and underscores only.
Choose local-only or trusted-LAN access. Plain HTTP is for trusted LANs only; public access must use HTTPS.
The installer prints the service URL, database name, and sync username. Save them for the next section.
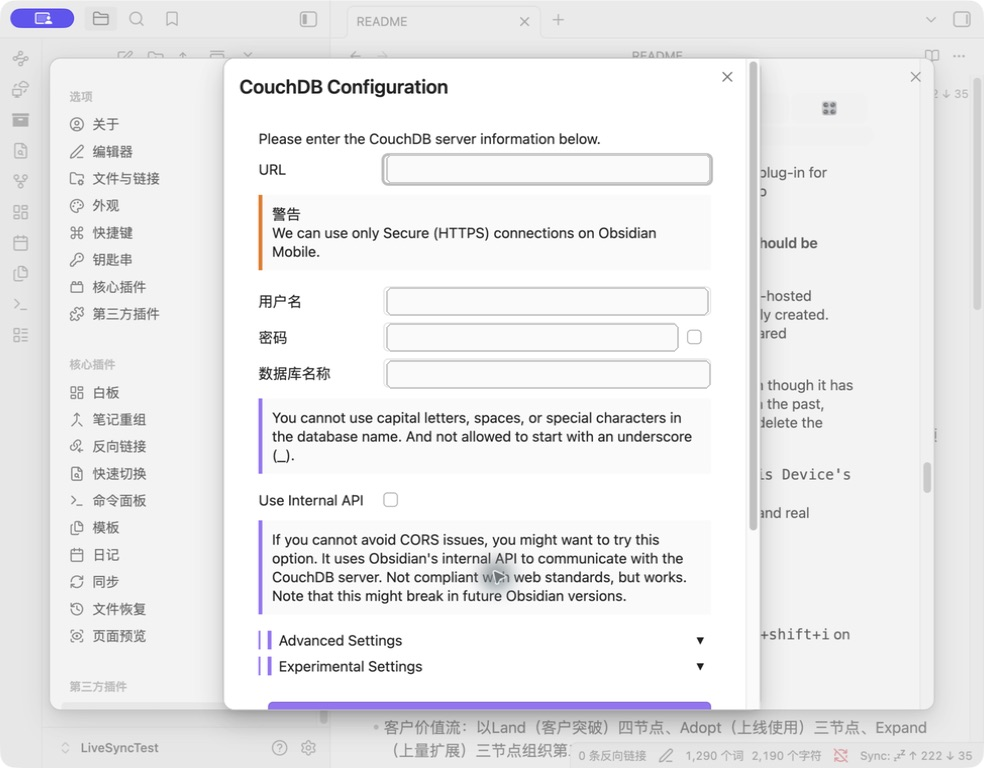
.env contains passwords: never upload, screenshot, or share it.You only need to touch two places: Self-hosted LiveSync settings in Obsidian and Sync settings in Modow. Both ends use the same four fields — CouchDB root URL, database name, daily-sync username, and password.
https://sync.modow.vip as the service URL in both Obsidian and Modow, turn off “Allow HTTP,” and enter the username, password, and database name you received. Do not add :5984. Do not add /_utils. https://sync.modow.net is a compatible alias; prefer .vip.| Modow field | Obsidian Self-hosted LiveSync | Example |
|---|---|---|
| Service URL | URL / URI | http://192.168.1.10:5984 |
| Database | Database name | modow_livesync_test |
| Username | Username | modow_sync |
| Password | Password | your daily-sync password |
/_utils. Official account: https://sync.modow.vip. Trusted LAN self-host: http://LAN-IP:5984. Public self-host: use an HTTPS reverse proxy such as https://your-domain. HTTPS uses port 443 by default, so omit it unless your port is non-standard.https://sync.modow.vip/_utils/ — browser management only, never a client service URL.Choose one method. Letting Modow create it is usually the fastest.
Go to Settings → Sync → LiveSync, enter a new database name and account, save, and tap Test connection. If the database does not exist, choose Create and initialize database.
Select CouchDB in Self-hosted LiveSync, fill in the same four fields, then run Create new database, Setup, or Check and fix database.
For the official service, open https://sync.modow.vip/_utils/ in a browser. For a LAN server, open http://SERVER-IP:5984/_utils. Create an empty database, return to Modow, test the connection, and initialize it for LiveSync.
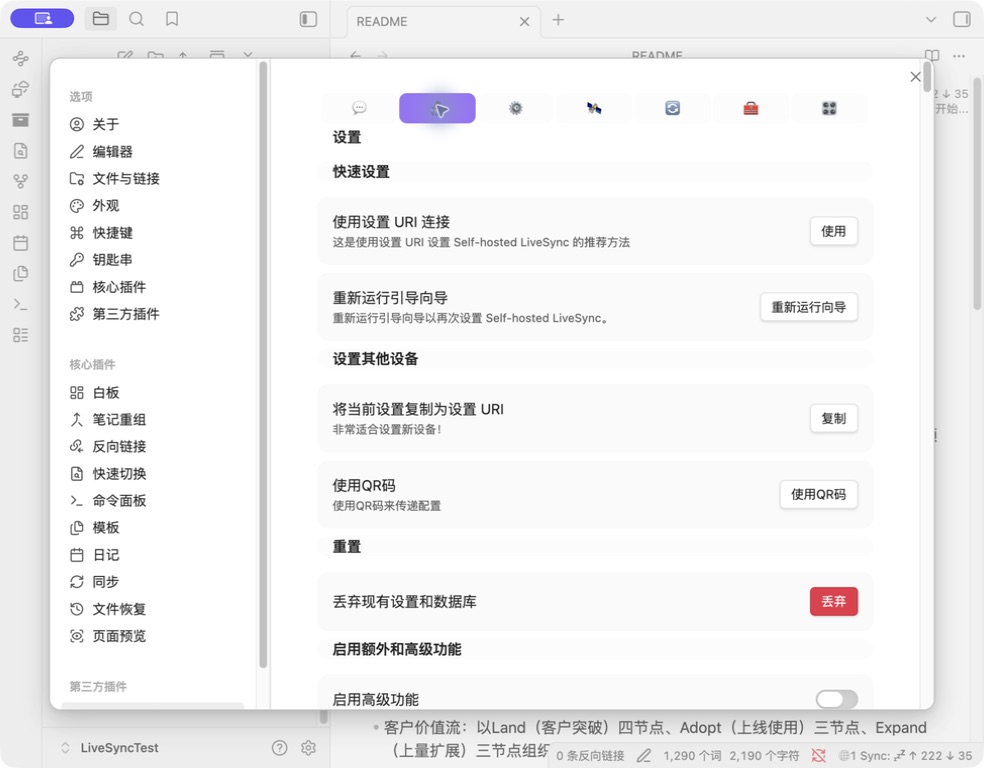
Open Obsidian's community plugins page, install Self-hosted LiveSync, and open its settings.
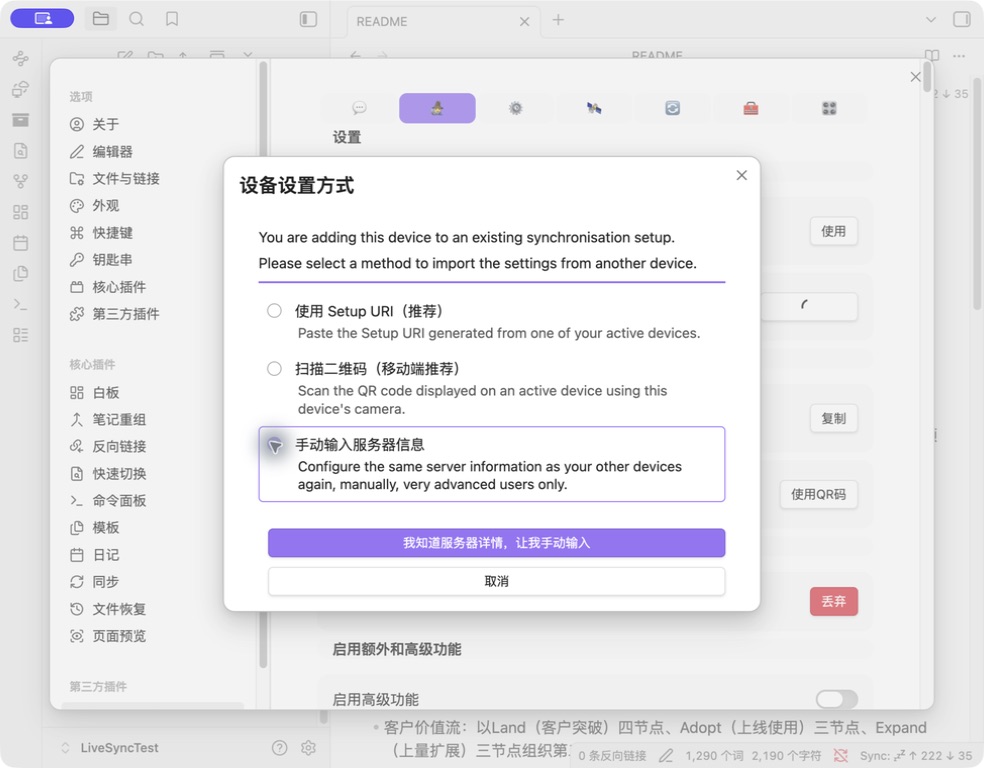
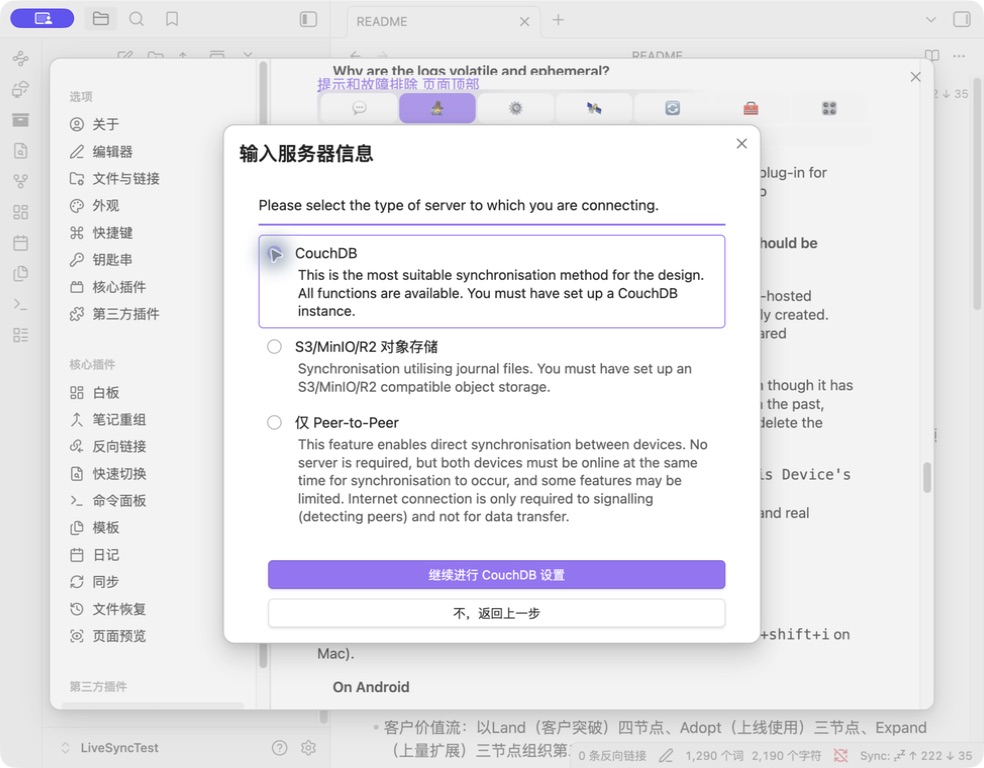
If asked for a setup method, choose manual server entry. Select CouchDB as the server type.
Use exactly the same service URL, database name, username, and password as Modow, then run Check and Fix database configuration.
Confirm Obsidian has written a test Markdown file to CouchDB before configuring the phone.
Open Modow → Settings → Sync and select LiveSync.
The service URL must start with http:// or https://. LAN HTTP normally includes :5984; standard HTTPS on 443 does not. Turn on Allow HTTP only for trusted LAN HTTP and keep it off for HTTPS.
Confirm the connection works and the database has been initialized.
Choose the first-sync direction based on where your data currently lives. Do not blindly merge both sides.
WebDAV syncs files and folders. You need four fields: service URL, root directory, username, and password. On desktop, use an Obsidian community plugin such as Remotely Save or WebDAV Sync and point it to the same remote directory as Modow.
| Modow field | Obsidian WebDAV plugin | Rule |
|---|---|---|
| Service URL | URL / Server / Endpoint | Include scheme and, when required, port and /dav/ |
| Root directory | Remote base directory / path | Use the same vault directory on both ends |
| Username | Username | Must have read/write access |
| Password | Password | Login password or app password, depending on provider |
Verified scope: the current version completed upload, download, conflict-copy, delete-protection, no-ETag change, save-triggered, startup, and foreground-interval sync tests on a HarmonyOS API 22 emulator with an isolated WebDAV service. This does not replace a test with your Jianguoyun account.
On first use, Test connection only checks an existing root directory; it does not create one. If it reports a missing remote directory, create ModowVault in Jianguoyun first and check that the root path has no missing or duplicated segment. A real sync will attempt to create a missing root directory.
/; do not duplicate path segments.Use one directory per vault, such as ModowVault.
Install a WebDAV-capable community plugin and enter the service URL, remote directory, username, and password.
Confirm the test Markdown file actually appears in the remote directory.
Go to Settings → Sync → WebDAV, enter the same information, save, then test the connection.
Verify upload, download, and rename before deciding whether remote deletes should propagate.
The first sync decides which side is the source. Make a backup, then choose based on where your data really is.
Sync Obsidian to CouchDB or WebDAV first, then pull the remote data into Modow.
Confirm the database or remote directory is new, then upload from Modow.
Back up both sides. Validate the merge in copies before connecting real data to one backend.
First decide whether the failure is network, credentials, path, or database. Work through these checks in order.
http:// or https:// scheme, port, LAN membership, firewall rules, and whether an internal-only service is reachable away from home.Start with a backup and one test file. Confirm edits travel in both directions before connecting your real knowledge base.